Create and work with font libraries in RightFont
RightFont uses font libraries to provide a centralized and reliable place for organizing your fonts. Keeping fonts inside libraries helps reduce conflicts with system fonts and creates a cleaner, more efficient font management workflow.
Create a Font Library
Here are the steps to create and effectively work with font libraries in RightFont:
- Open RightFont on your computer.
- Click the + button in the sidebar and choose New Library from the context menu.
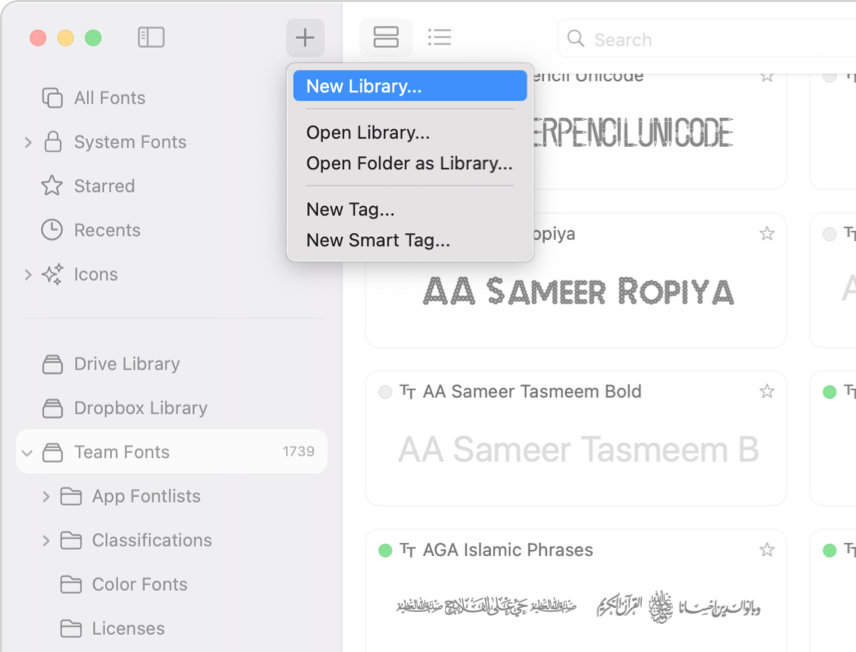
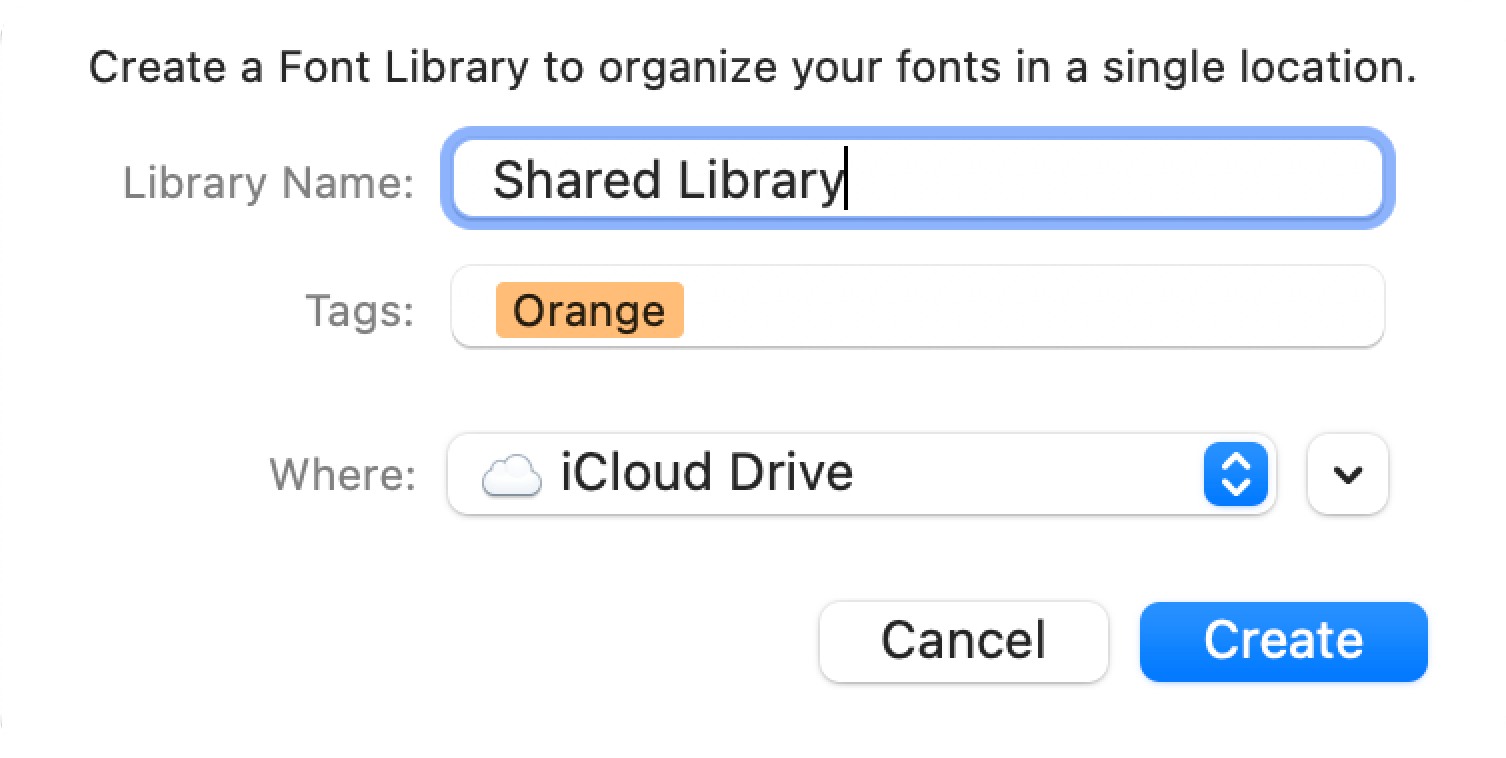
- Enter a descriptive name for your library.
Once the library is created, you can start adding fonts to it.
Add Fonts to a Library
You can import fonts into a library in several ways:
- Drag and drop font files from your computer directly into the library.
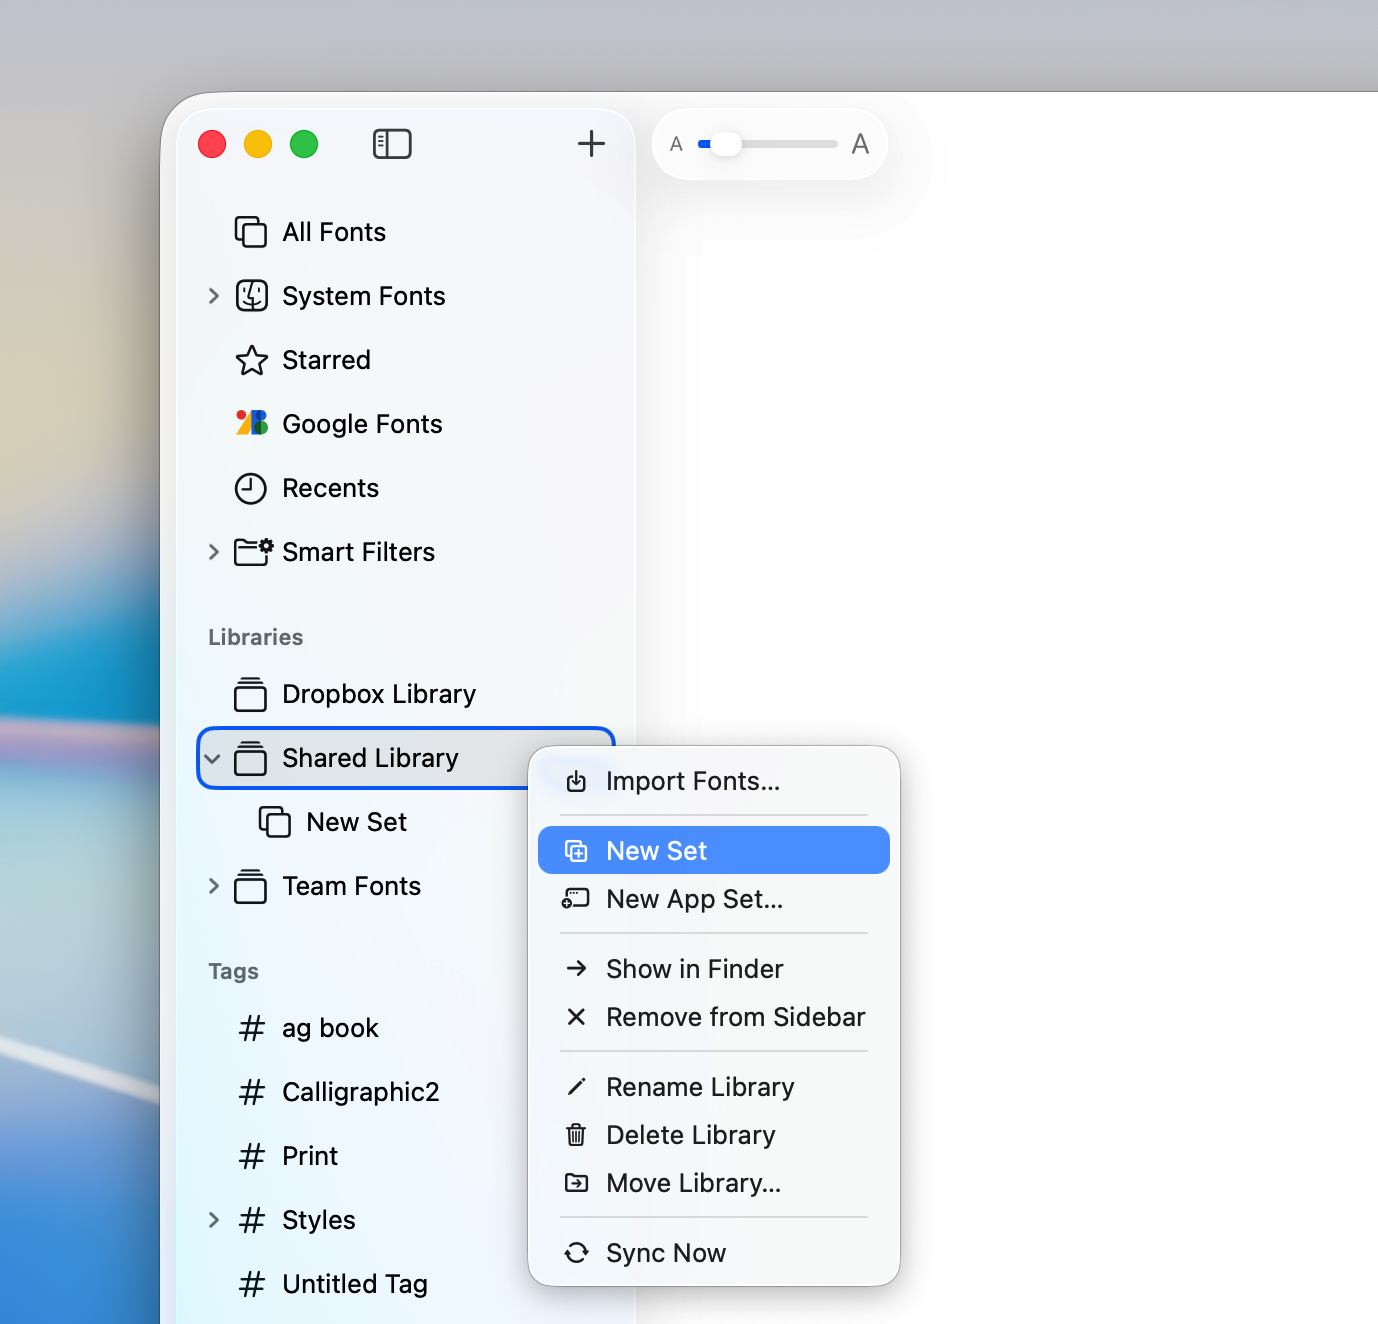
- Right-click the library and choose Import Fonts to select font files manually.
- Use Import Fonts to import entire folders, including all fonts contained within them.
- You can further categorize and organize your fonts using Font Sets.
Organize Fonts with Font Sets
Font Sets help you categorize and organize fonts within a library.
Create a Font Set
- Right-click a font library and choose New Set from the context menu.
- Enter a name that describes the purpose or category of the set.
Add Fonts to a Font Set
- Drag and drop fonts from the library into the font list of the set.
- Or use Import Fonts from the context menu to add fonts directly to a specific Font Set.
You can also create nested Font Sets inside other Font Sets for more detailed organization.